FRP bypass without PC is something millions of people search for every month and most of them end up on pages that either don’t work on their device or immediately push them toward a paid tool. The honest reality is that no-PC bypass methods do work in 2026 but only on specific Android versions and with the right approach for your exact device brand. This guide covers five methods that are actually working right now, tells you upfront which one fits your situation, and links directly to the tools and APK files you need without sending you on a download treasure hunt.
All APK download links are on our here.
⚠️ Disclaimer
The tools and methods on this page are for educational and informational purposes only. Only use them on devices you personally own or have been given explicit permission to work on. Bypassing FRP on a device you don’t own is illegal and can result in serious legal consequences. Always comply with Google’s terms of service and your device manufacturer’s policies. Rise ROM does not support any unauthorized or illegal use of the tools shared here.
Which Android Versions These Methods Work On – Read This First
This is the section every other guide skips and it’s the reason most people waste an hour trying methods that were never going to work on their device. Before you try anything, know this: no-PC FRP bypass methods have a significantly lower success rate on Android 12 and above. Google has progressively patched the exploits these methods rely on with every major Android update since Android 11.
Here’s the breakdown:
| Android Version | No-PC Methods | Success Rate | Best Method |
|---|---|---|---|
| Android 5 to 7 | All methods available | Very High | APK via browser or TalkBack |
| Android 8 to 10 | Most methods work | High | APK via browser, OTG drive |
| Android 11 | Some methods work | Medium | APK via browser, SMS exploit |
| Android 12 | Limited options | Low to Medium | OTG drive, SMS exploit on some devices |
| Android 13 | Very limited | Low | Worth trying OTG, otherwise use PC tool |
| Android 14 and above | Mostly patched | Very Low | PC tool strongly recommended |
If your device is on Android 13 or 14 and none of the methods in this guide work, that’s not a mistake on your part. The vulnerability simply doesn’t exist on that patch level. We cover what to do in that situation at the end of this guide.
Check your Android version now before reading further. Go to the setup screen and look for any “About” or “Software Info” option if accessible, or check the box the phone came in. Knowing your Android version before you start saves you from spending time on methods that won’t apply.
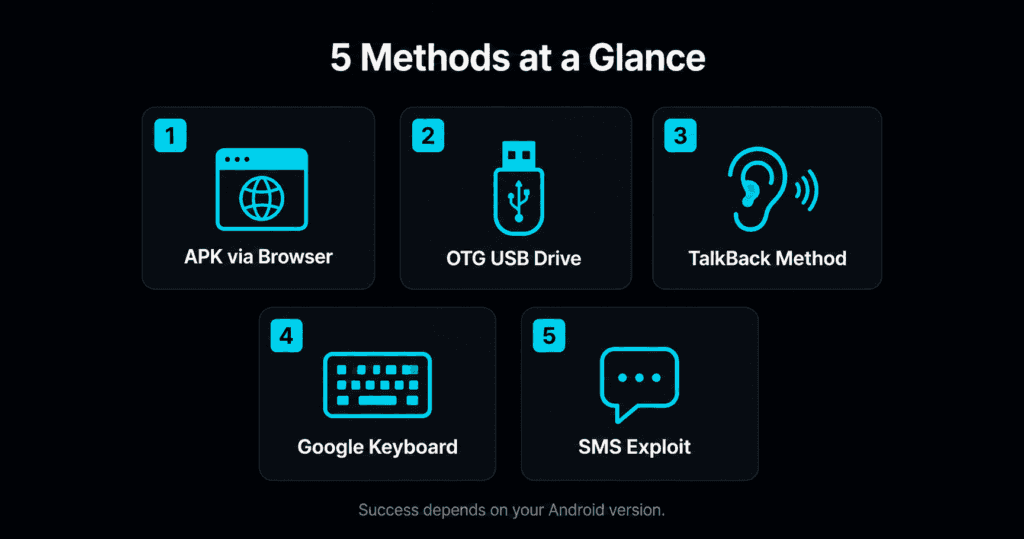
Method 1: APK Sideload via Browser
This is the most widely used no-PC bypass method and the one most people try first. It works by opening a browser from the FRP lock screen, downloading a bypass APK, installing it and using it to remove the Google account verification. No cable, no computer, just Wi-Fi and the right APK.
This method works best on Android 8 through 11. On Android 12 and above the browser access point is often patched but worth trying before moving on.
What you need: An active Wi-Fi connection, the phone number or a Wi-Fi connected device to look up download links if needed, and a working Wi-Fi network nearby.
Step 1: Connect to Wi-Fi On the FRP setup screen connect to any available Wi-Fi network. This is essential. Without internet access you can’t download the APK and the method won’t work.
Step 2: Access the browser This is the step that varies by device. Try these approaches in order:
On Samsung devices tap Emergency Call, then type *#0*# on the dialer. If a test mode screen opens tap the back button carefully and look for a way to open a browser or settings.
On most Android devices tap Emergency Call and look for a small info button or keyboard icon. Some devices show an “Add a network” option in the Wi-Fi setup screen. Tap and hold that field to access a paste or text option that can open a browser via a long press.
On Motorola devices the setup screen sometimes has an accessibility shortcut at the bottom that opens system navigation and eventually a browser.
If none of these work on your device, skip to Method 2 or Method 3 below.
Step 3: Download the right APK Once you have a browser open go to riserom.com/frp-tools and download the APK that matches your Android version. Use the compatibility table at the top of that page to pick the right one. For Android 8 through 10 use Android_8-9-10_GAM.apk. For Android 11 try FRP_RISErom Latest.
Step 4: Install the APK Allow installs from unknown sources when prompted. If you can’t find the downloaded file look for a file manager accessible through the same navigation path you used to reach the browser. ES File Explorer from our tools list works well for locating downloaded APKs when the default file manager isn’t accessible.
Step 5: Add a Google account and restart Open the installed APK, add any Google account you have access to, then restart the device. The FRP screen should be gone and you can complete normal setup.
Method 2: APK via OTG USB Drive
This method is underused but genuinely effective, especially on devices where the browser isn’t accessible from the setup screen. Instead of downloading the APK through a browser you load it onto a USB drive beforehand and plug it directly into the locked device using an OTG adapter.
This method works on Android 8 through 12 on devices that support OTG connections. Most modern Android phones support OTG but some budget models don’t. Check your phone’s specifications if you’re unsure.
What you need: A USB OTG adapter (USB-C to USB-A or Micro-USB to USB-A depending on your device), a USB flash drive, and a second device like a PC or another phone to copy the APK files to the drive beforehand.
Step 1: Prepare the USB drive on another device On any working PC or phone download the correct FRP bypass APK from our FRP Tools page. Copy it to the root folder of the USB flash drive. Don’t put it inside any subfolder. Also copy ES File Explorer APK to the drive since you’ll need a file manager to install the bypass APK from the drive.
Step 2: Connect the OTG adapter and drive On the locked device’s setup screen connect the OTG adapter and plug the USB drive into it. On most Android devices a popup will appear asking what you want to do with the connected drive. This popup is your entry point.
Step 3: Open the file manager Tap the popup to browse the drive’s contents. If a file manager appears install ES File Explorer from the drive first. If no popup appears try navigating through whatever settings or accessibility options are available on the setup screen to find a file manager or the connected drive.
Step 4: Install the APKs Install ES File Explorer from the drive first, then use it to browse to the bypass APK and install that. Allow unknown sources when prompted.
Step 5: Run the bypass and restart Open the installed bypass APK, add a Google account and restart. The OTG method sidesteps the browser access problem entirely which is why it works on some devices where Method 1 fails.
Method 3: TalkBack Accessibility Method
TalkBack is Android’s screen reader accessibility feature and it’s been used as a bypass route for years because it provides access to system functions that are normally hidden behind the FRP lock screen. On older Android versions this method was very reliable. On Android 11 and above it has been largely patched but still works on some devices depending on the firmware build.
This method works best on Android 7 through 10. On Android 11 it sometimes works. On Android 12 and above it’s mostly patched.
What you need: Just the locked device. No extra hardware, no downloads, no Wi-Fi even in some cases. This is the most hardware-free method of the five.
Step 1: Enable TalkBack On the FRP setup screen press and hold both Volume Up and Volume Down buttons simultaneously for about 3 seconds. TalkBack should activate and you’ll hear a voice prompt or see the screen change.
Step 2: Access the TalkBack tutorial A black tutorial screen will appear. Draw an L-shape on this screen, which means swipe down then swipe right in one connected motion. This opens the Use Voice Commands option.
Step 3: Open Settings via TalkBack On the new screen tap the keyboard icon, type the word Settings in the search field, then double tap the Settings result to open it. On some devices you need to long press and then double tap. TalkBack’s navigation requires double tapping instead of single tapping which trips a lot of people up the first time.
Step 4: Navigate to accounts Once Settings is open press both Volume buttons together again to disable TalkBack so you can navigate normally. Go to Accounts, find Google, and remove the Google account linked to the FRP lock.
Step 5: Factory reset and setup After removing the account go to Backup and Reset, perform a factory reset and complete the normal setup. Since the account was removed before the reset FRP won’t activate.
If the L-shape gesture doesn’t trigger the tutorial: Try drawing the L-shape more slowly and in a single smooth motion. On some devices the gesture needs to be done on a specific part of the screen. If TalkBack activates but the tutorial doesn’t appear try tapping the center of the screen once and then drawing the L-shape.
Method 4: Google Keyboard Method
This method is Samsung specific and works on older Samsung devices running Android 8 through 11. It exploits a pathway through the Google Keyboard settings that leads to a web search which then gives you browser access to download an APK or navigate to settings.
If you have a non-Samsung device skip this method entirely and try Method 1 or Method 3 instead.
What you need: A Samsung device running Android 8 to 11, connected to Wi-Fi.
Step 1: Reach the keyboard on setup screen On the Samsung FRP setup screen connect to Wi-Fi first. Then tap any text field on the screen to bring up the keyboard. The Google Keyboard should appear since it’s the default on most Samsung devices.
Step 2: Access keyboard settings Tap and hold the microphone icon or the comma key depending on your Samsung model. A small settings or keyboard settings option should appear above the keyboard. Tap it.
Step 3: Navigate to Help and Feedback In Google Keyboard Settings tap the three dot menu in the top right corner and select Help and Feedback. This opens a Google help page inside a limited browser view.
Step 4: Open a web search On the help page find any text, tap and hold it to select it, and then tap Web Search from the options that appear. A full browser window will open.
Step 5: Download and install the bypass APK In the browser go to riserom.com/frp-tools and download the appropriate bypass APK. Install it, add a Google account and restart.
Why this method fails on newer Samsung devices: Samsung updated their firmware to remove the Help and Feedback pathway from the keyboard settings starting with certain One UI versions. If you tap and hold the comma or microphone key and nothing appears, or if the three dot menu in keyboard settings has no Help option, this method is blocked on your firmware. Move to Method 1 or the OTG method instead.
Writing sections 7 through 13 now, taking my time with each one:
Method 5: SMS Exploit
The SMS exploit is the most unique no-PC bypass method because it doesn’t require you to do anything on the locked device at all except have a SIM card inserted. You send a specially crafted message from a second phone to the locked device and that message triggers a system dialog that gives you access to settings normally hidden behind the FRP screen.
This method works best on Android 8 through 11 on Samsung devices. Success depends heavily on whether your carrier network passes the required message types through without filtering.
We have a dedicated post covering this method in full detail including the tools you need, carrier compatibility, step by step instructions and troubleshooting. Rather than repeat everything here read our complete FRP SMS APK guide for the full walkthrough.
The short version: you need a second working Android phone with HushSMS or FRPFILE SMS APK installed, an active SIM in the locked device, and a carrier that allows WAP Push or Class 0 messages. If your carrier blocks these message types the method won’t work regardless of everything else being correct.
Brand Specific Notes
The five methods above work differently depending on which brand your locked device is. Here’s what you need to know for the most common brands before you start:
Samsung Samsung has the most no-PC bypass options available but also the most variation between models. The Google Keyboard method and TalkBack method both work specifically on older Samsung devices. The emergency call trick and #0# diagnostic code are Samsung specific and worth trying before any APK method. On newer Samsung devices running Android 12 and above with recent security patches almost all no-PC methods are patched. ZeroKnox Removal Tool and HalabTech FRP Tool are the best options for newer Samsung models but both require a PC. Check our Samsung FRP Tools guide for the complete comparison.
Xiaomi Xiaomi devices running Android 10 and below respond well to the APK via browser method. On MIUI 12 and above the browser access point during setup is often restricted. The OTG drive method tends to work more reliably on Xiaomi than the browser method since it sidesteps the setup screen browser restriction entirely. Xiaomi devices may also have a Mi Account lock on top of regular FRP which is a separate layer that APK methods alone can’t always address.
Oppo and Realme These brands have a custom ColorOS and Realme UI setup wizard that is more restricted than stock Android. The standard TalkBack gesture sometimes works on older Oppo and Realme devices running Android 9 and 10 but fails on newer ColorOS versions. The OTG method is your best no-PC option on these brands. On newer Oppo and Realme devices with Android 12 and above a PC based tool is more reliable.
Motorola Motorola runs close to stock Android which actually makes it one of the more accessible brands for no-PC bypass on older versions. The TalkBack method works reliably on Motorola Android 8 through 10. The setup wizard on some Moto models has an accessibility shortcut button at the bottom of the screen that provides a navigation pathway you don’t get on other brands. On Android 12 and above Motorola devices follow the same pattern as other brands and no-PC methods become unreliable. Check our full FRP Bypass Motorola guide for model specific steps.
Infinix and Tecno These brands run on MediaTek chipsets and older firmware versions tend to be more vulnerable to no-PC methods. The APK via browser method works on many Infinix and Tecno devices running Android 10 and below. The TalkBack method also has a reasonable success rate on these brands compared to Samsung and Oppo where it’s more restricted. On newer Infinix and Tecno devices with Android 12 and above consider the OTG method first before trying browser based approaches.
Nokia Nokia runs very close to stock Android under Android One and later Android Go configurations. This actually helps with TalkBack and accessibility based methods since Nokia doesn’t add as many manufacturer restrictions to the setup wizard. The TalkBack method works on Nokia Android 8 through 11 more consistently than on many other brands. The APK via browser method is also solid on Nokia devices within that Android range.
When No-PC Methods Won’t Work
This section is important and worth reading even if you haven’t tried the methods yet.
If your device is running Android 13 or 14 with a 2024 or 2025 security patch, the honest truth is that no-PC bypass methods have a very low chance of working. Google and device manufacturers have systematically patched every exploit these methods relied on in newer firmware. It’s not that you’re doing something wrong. The vulnerability simply doesn’t exist on those devices anymore.
In that situation you have three options:
The first option is trying a firmware downgrade. If your device received a recent update that patched the bypass you can flash an older firmware version using a PC based tool like Odin for Samsung or SP Flash Tool for MediaTek. This takes the device back to a patch level where no-PC or PC-based free methods work again. After completing the bypass you can update the firmware again. Check our firmware page for the right file for your device.
The second option is using a PC based tool. Most free tools like SamFw Tool, ZeroKnox, Prime Tool X and HalabTech work far more reliably on newer security patches than any no-PC method. If you have access to a Windows PC even temporarily these tools are worth trying before giving up. Our FRP Tools page has all of them with complete guides.
The third option is official recovery. If none of the above works and you have proof of purchase, contacting the device manufacturer’s support with your purchase receipt is always worth trying. Samsung in particular will sometimes remove FRP through official channels when you can prove ownership. It takes longer but it’s the safest and most guaranteed solution for newer devices.
Errors and Fixes
Can’t find any way to open a browser from the setup screen The browser access point varies significantly by device and Android version. If the emergency call approach doesn’t work try the TalkBack method or the OTG drive method instead. These don’t require browser access at all. If you’re on a Samsung device also try the Google Keyboard method before giving up on no-PC options entirely.
APK downloaded but won’t install You need to enable installs from unknown sources first. On Android 8 and above this is a per-app permission. When you tap the downloaded APK you should see a prompt asking you to allow installation from that source. Tap Settings in the prompt and enable it. If you can’t reach the APK at all, install ES File Explorer from the OTG drive or browser and use it to locate the file in your downloads folder.
APK installed but nothing happens when opened Make sure the device is still on the FRP lock setup screen when you run the APK. These tools are designed to work during the initial setup process not after the device has fully booted. If the device completed setup somehow and you’re in the full Android environment the APK won’t be useful at this stage.
TalkBack won’t activate with volume buttons Try holding both volume buttons longer, at least 5 to 7 seconds. On some devices TalkBack needs to be enabled in accessibility settings first before the volume button shortcut works. If the setup screen has any accessibility option in the corner of the display tap it and look for TalkBack.
TalkBack activated but L-shape gesture does nothing Draw the L-shape more slowly in a single connected motion. Start from the top of the screen, swipe down about a third of the way, then immediately swipe right without lifting your finger. The gesture needs to be fluid not two separate swipes. On some Samsung devices the shape needs to be drawn in the lower portion of the screen rather than the center.
Google Keyboard method fails at the Help and Feedback step Samsung removed this pathway in certain One UI updates. If the three dot menu in keyboard settings has no Help option your firmware has patched this method. Switch to the APK via browser method or the OTG drive method.
OTG drive not detected by the locked device Make sure your phone supports OTG before trying this method. Also try a different OTG adapter since cable quality matters. Some USB-C OTG adapters are data only while others are charge and data. You need one that supports data transfer. If the drive is detected but no popup appears try navigating to the storage settings from whatever limited setup screen access you have.
SMS method not triggering any dialog on locked device Your carrier is almost certainly blocking the WAP Push or Class 0 message type. Try a SIM from a different carrier in the locked device and send the message to that SIM’s number. If a different carrier produces the dialog your original carrier has this exploit filtered. Read the full troubleshooting guide in our FRP SMS APK post.
FAQ
Can FRP be bypassed without a PC on Android 14?
Realistically no in most cases. Android 14 with current 2025 and 2026 security patches has patched all the major no-PC bypass exploits. The OTG method and SMS method are worth a single attempt but the success rate is very low. A PC based tool is the practical solution on Android 14 devices with recent patches.
Which no-PC method has the highest success rate in 2026?
For devices on Android 8 through 11 the APK via browser method has the highest overall success rate when you can access a browser from the setup screen. For devices where browser access is restricted the OTG USB drive method is the most reliable alternative since it bypasses the browser access problem entirely.
Do I need Wi-Fi for all five methods?
The APK via browser method and Google Keyboard method both require Wi-Fi since you need to download an APK. The TalkBack method does not require Wi-Fi in most cases since it works entirely through the device’s accessibility system. The OTG drive method also doesn’t need Wi-Fi since the APK is already on the USB drive. The SMS method requires cellular connectivity on the locked device to receive the message.
What is the easiest no-PC method for a complete beginner?
The OTG USB drive method is arguably the most straightforward for someone who has never done this before. You prepare everything on a separate device beforehand, plug the drive in and install the APK. There are no timing sensitive gestures and no reliance on finding hidden browser access points on the setup screen.
Why does the method that worked on my friend’s phone not work on mine?
Because FRP bypass success depends on four factors working together: the Android version, the security patch date, the device brand and the specific firmware build. Two phones can both be Samsung Galaxy A series running Android 12 but if one has a January 2024 patch and the other has a September 2024 patch they may respond completely differently to the same bypass method.
Will any of these methods delete my data?
The bypass methods themselves do not wipe your data. However if the device was already factory reset before you started there’s no data left anyway. If you’re bypassing FRP on a device that hasn’t been wiped yet which is a less common scenario your data should remain intact through the bypass process.
Related Tools
If the no-PC methods didn’t work on your device here are the resources on Rise ROM most likely to help next.
FRP Bypass APK Files has the complete collection of APK files for all Android versions with direct download links. This is where to go if you need a specific APK for the browser or OTG method.
FRP SMS APK covers the SMS exploit method in complete detail including carrier compatibility, the tools you need on your second phone and full troubleshooting.
Samsung FRP Tools compares the top five free PC based Samsung tools for when no-PC methods aren’t an option on your Samsung device.
FRP Bypass Motorola covers Motorola specific bypass steps including both no-PC and PC based methods with model specific guidance.
OTA Firmware is where to go if your device needs a firmware downgrade to an older patch level before a bypass method will work on it.
USB Drivers has everything you need if you decide to switch to a PC based tool after exhausting the no-PC options.
Google Support Guide on FRP Bypass Without PC.